Installing Omeka
Omeka is an open-source web application that can be used to create and display online digital collections. Developed by programmers at George Mason University, Omeka was designed to be user-friendly, both during installation and daily usage. To install Omeka, follow these steps:
1. Log-in to your cPanel (https://emerson.build/dashboard) using your Emerson username and password.
2. Click Omeka in the cPanel’s Applications section.

3. Click Install this application in the upper-righthand corner.

4. The next page asks for some information.
First you’ll decide where to install the site, which will determine its address. If you want to install Omeka on your main directory (the same address as your domain), you can leave the directory field empty. If you’ve created a subdomain, you can select it from the dropdown menu.
Continuing down the page: under Automatic Update Backup, select “Do not create a backup.” See Managing Backups for more information about how to create backups.
Under Settings, choose your administrator username and password for the new site. Write these down and don’t share them with anyone!
Under Advanced, leave “Automatically manage advanced settings for me” checked and the installer will create a database for you (recommended). If you’ve already created a database for this website, you can choose “Let me manage these settings” and enter the details.
Click Install to continue.
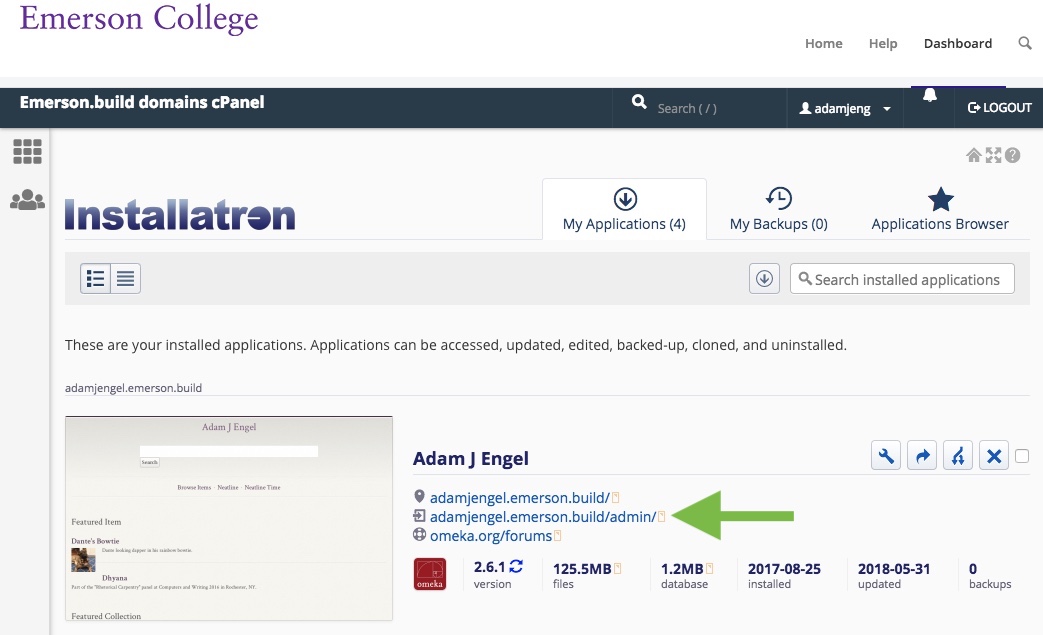
5. Omeka will take a few moments to install, and a progress bar will keep you updated. When it is complete, you will see a link to the front-end of your new Omeka site as well as a link to the back-end administrative section for your Omeka site. Click the back-end link (ending in “/admin”). Write down this address: it’s where you go to edit your site.
Log-in using the administrative username and password you chose in step 4.
6. Click Settings in your Omeka site’s top admin bar. Enter an Administrator Email and a Site Title. In the “ImageMagick Directory Path” field, enter “/usr/bin“. This will allow Omeka to properly process and display images.
The Administrator Email is the address that messages from the system (e.g. a forgotten password reminder) will be sent from. You might want to create a custom email address using these instructions, for example webmaster@yourdomain.com or omeka-admin@yourdomain.com, to use for this purpose.
The Site Title will appear at the top of your visitors’ browser windows.

Congratulations! Omeka is now installed and configured. Click your site’s title at top-left to visit its front-end (the part that visitors see), or use the Dashboard (vertical menu at left) to begin adding content.
Installing Plugins
There are a variety of plugins that enable additional functionality in Omeka. See all plugins available for Omeka and their descriptions.
1. Download the desired plugin from the page linked above by clicking the Download button to its right. A zip file will download.

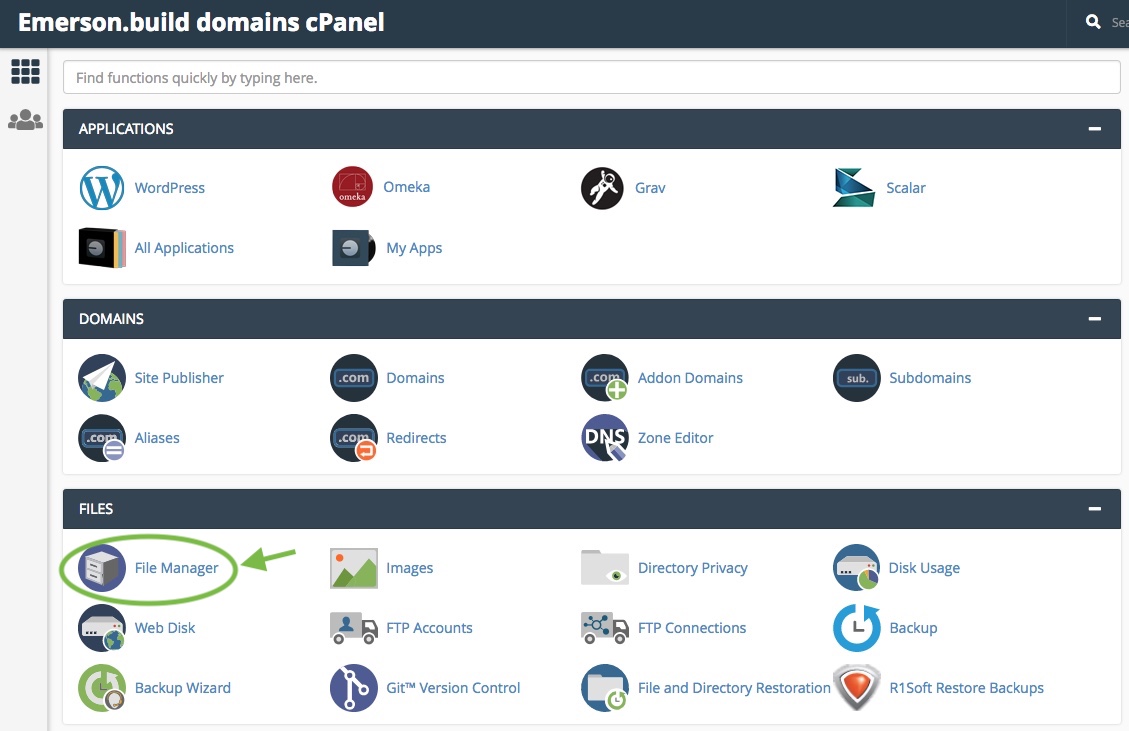
2. Next, go to your cPanel (https://emerson.build/dashboard). Click on File Manager.
3. Go to the public_html > plugins folder by clicking the + left of the public_html folder to expand it, then clicking on the revealed Plugins folder.
NOTE: If you installed Omeka in a subdirectory, you’ll need to add the subdomain to the above path. For example, if you installed Omeka in the “archive” subdirectory, the path to the Plugins folder will be public_html > archive > plugins.

4. Next, you will need to upload the zip file from step 1 into the Plugins folder. Click Upload in the top menu to open a new window. Click Select File to browse your computer, or drag-and-drop the file into the window.
When the upload is complete, click “Go back to home/yourdomain/public_html/plugins” at the bottom of the page to return to the File Manager. You will see that the zip file has appeared in the Plugins folder.

5. Make sure the zip file is selected (it should be highlighted in blue), then click Extract from the menu at the top of the page. A small window will open up to confirm where the file will be extracted to. If you clicked Upload from the Plugins folder, it should read public_html/plugins. Leave this field as-is. Click Extract File(s).

Another pop-up window will list the extracted contents. Click the Close button.
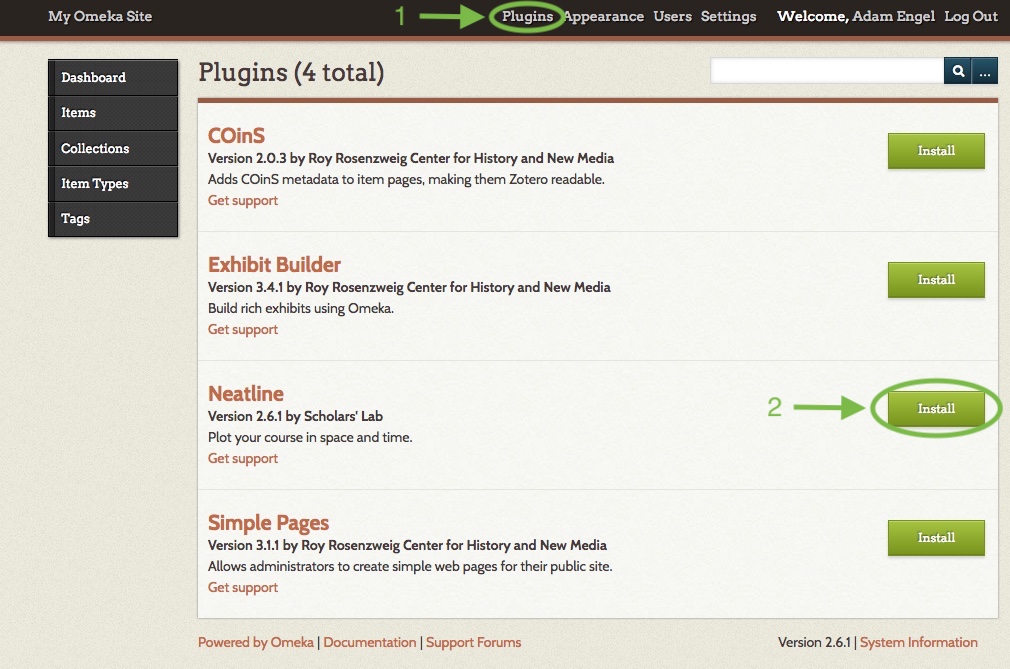
6. The new plugin should now be available on the Plugins page, accessible by clicking Plugins in the black admin bar at top-right of your Omeka dashboard. Find it and click the Install button to its right. Your plugin is now active.
Note: Some plugins will create a new button on the dashboard, like so. Click on their button to use them!

Using Omeka
You can learn how to use this application in the official Omeka Support Documentation.
Or, see the next guide to learn how to use the Neatline plugin to create interactive maps!